Code Environments
| 🏆 This is a premium feature |
|---|
Use case
Consider building a custom environment for your Python code if you need to:
- Install a specific Python version (e.g.
Python 3.10). - Install additional Python packages and/or specific package versions.
- Install additional system packages (e.g.
yum install). - Make certain files available inside the filesystem.
- As opposed to downloading necessary files at runtime, which can slow down the code.
How it works
Using MecSimCalc's custom environment builder, the developer can create a custom environment for the user to run the app's code in. The environment builder is an easy-to-use interface that allows the developer to specify 2 build files, which are used to build the environment (i.e. a docker image). Once the environment is built, it will be saved and can be used across multiple apps.
Note that each environment is only visible and editable by the developer who created it. Follow the instructions below to create a custom environment.
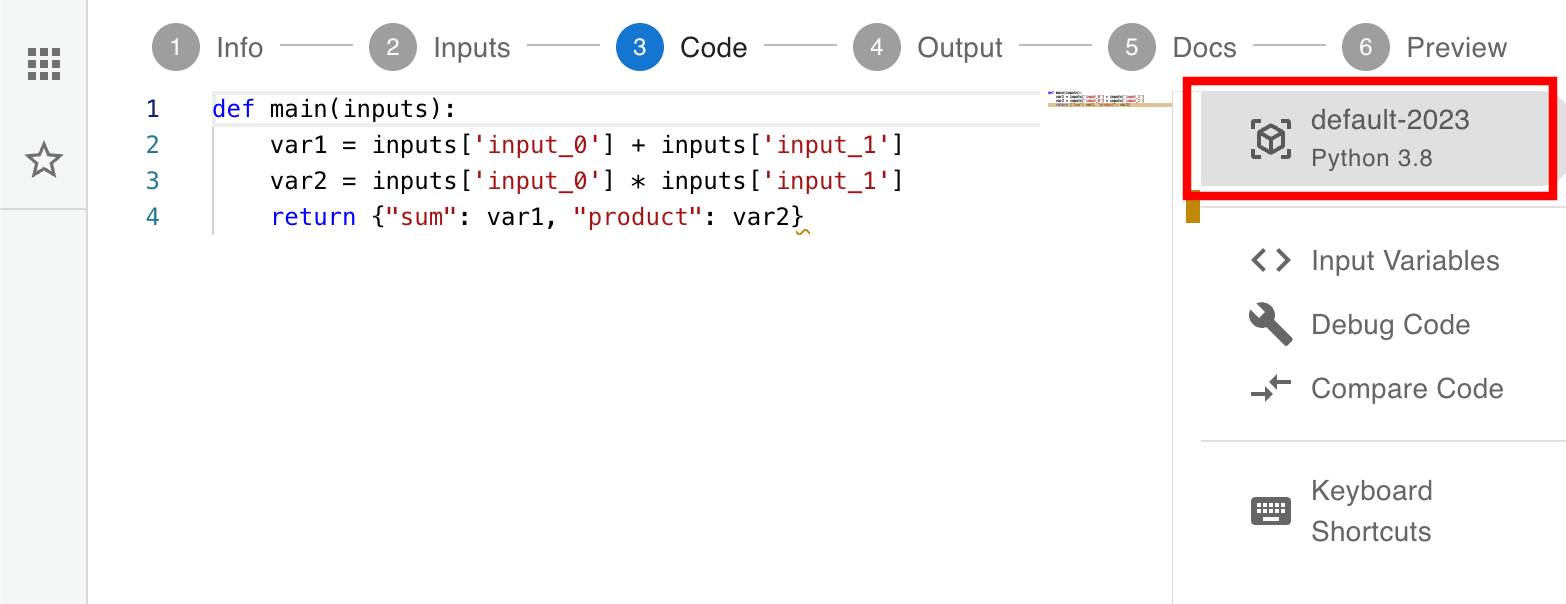
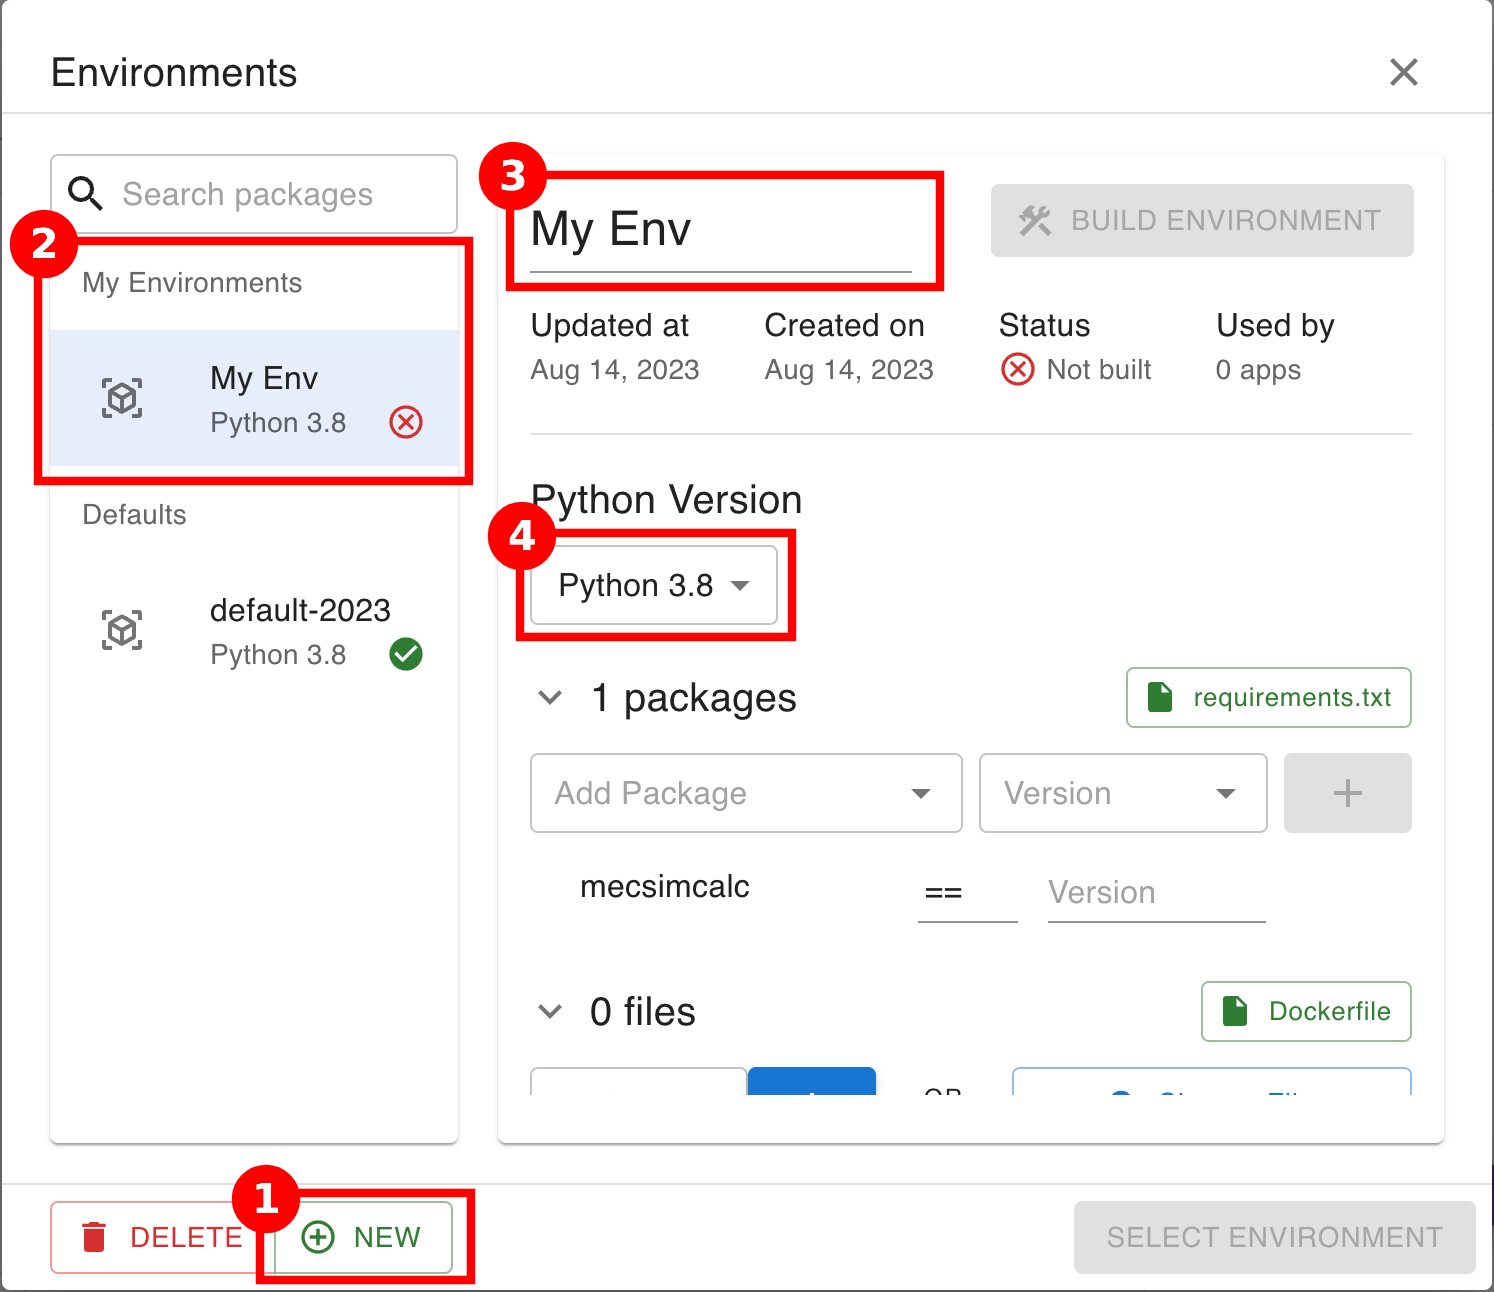
Step 1: Open the environment builder
In your app editor, go to the Code step and click on Python 3.x in the toolbar on the right to open the environment builder:
Once opened, create a new environment:
- Click on NEW in the bottom left corner.
- Notice that a new environment has been created in the list on the left.
- Your custom environments will appear under the My Environments header.
- Default environments available for all users will appear under the Defaults header.
- Edit the "My Env" to give your environment a useful name.
- The other info shown at the top are:
- Updated at: the last time the environment was updated.
- Created on: the date that the environment was created.
- Status: whether the environment has been built or not built. The Select Environment button is only available for built environments.
- Used by: the number of apps that are using this environment.
- The other info shown at the top are:
- Select a Python version from the drop down.
Step 2: Add Python packages
Option 1: Builder
Add the Python packages to install (i.e. packages to pip install). You will need:
- Package name (required).
- Package version (optional): leave blank if any version is acceptable (recommended).
- Note: by specifying incompatible versions, the build will fail. Whereas, by leaving the version blank, the latest compatible version will be installed with no error.
- Version operator: defaults to
==(recommended). Learn more.
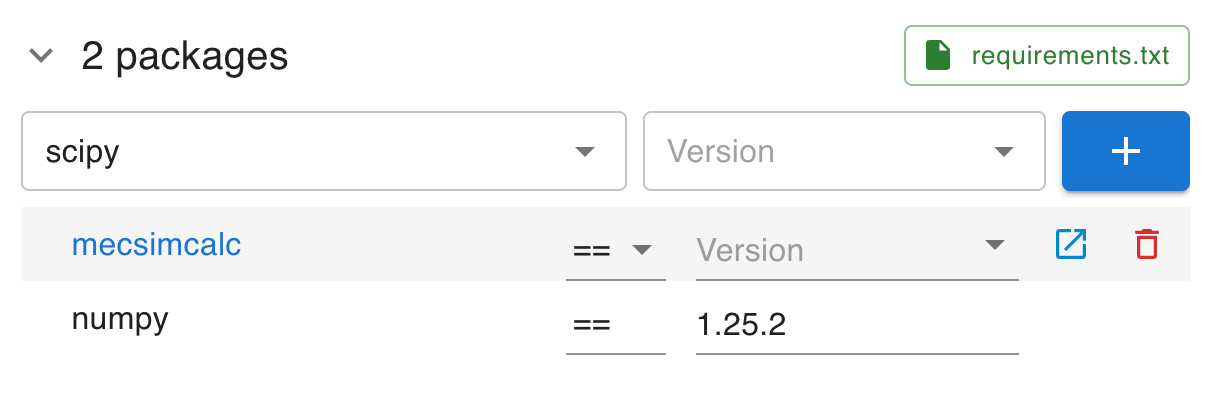
Option 2: requirements.txt
Alternatively, Python packages can be installed by editing the requirements.txt file directly. Click on the requirement.txt button to open the code editor.
Read more on requirements.txt files.

To generate a requirements.txt file from your local Python environment, run the following command in your terminal:
pip freeze > requirements.txt
Then open and copy the contents of the requirements.txt file into the code editor.
Step 3: Add system packages(advanced)
We utilize yum for installing system packages. Here's how to install system packages in a Dockerfile:
# Install system packages using yum
RUN yum install -y package-name
Replace package-name with the actual packages needed for your project.
Do not delete anything else in the Dockerfile!
The Dockerfile can be edited directly to further configure the code environment, by clicking on the Dockerfile button. However, this is strongly discouraged as it may cause the build to fail or the environment to break. Read more on Dockerfiles
Step 4: Add files
Upload any files that you want to be available inside the environment's filesystem. This is useful for:
- Files that are too large to download at runtime.
- Files that are not publicly available online.
- Files that the code expects to exist at a specific path.
Upload files by either:
-
A publicly accessible url hosting that file using the Add File by URL textfield. This requires:
- The file to be accessible without a password and with a valid url.
- The url must be the raw contents of the file and not a webpage. For example,
https://github.com/MecSimCalc/MecSimCalc-docs/blob/main/README.mdwill not work, whereashttps://raw.githubusercontent.com/MecSimCalc/MecSimCalc-docs/main/README.mdwill.
-
Uploading a local file from your computer using the Choose File button.
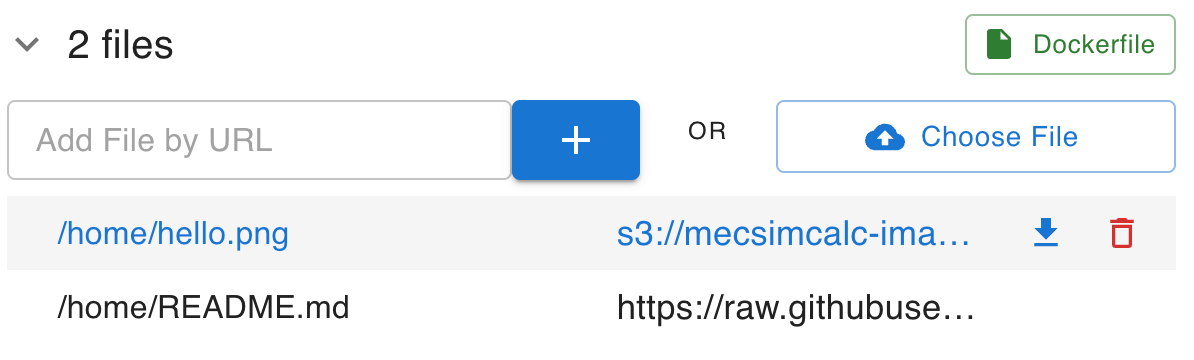
All uploaded files are saved in the /home folder and can be accessing in the Python code by its file path: /home/<filename> (e.g. /home/hello.png).
Step 5: Build the environment
Once you are happy with the environment, click on the Build Environment button to start the build. This may take many minutes, so please be patient and do not close the window!
If the build is successful, the environment will be saved and can be used across multiple of your apps. If the build fails, please view the error, make the necessary changes and try again.
Updating an environment shared by other apps (both draft and published), will also update the environment for those apps. This may cause the apps to break if the environment is not compatible with the code. It is strongly recommended to create a new environment and then update the apps to use the new environment.
Once the build is successful, close the building window and click on the Select Environment to use the environment for your app.