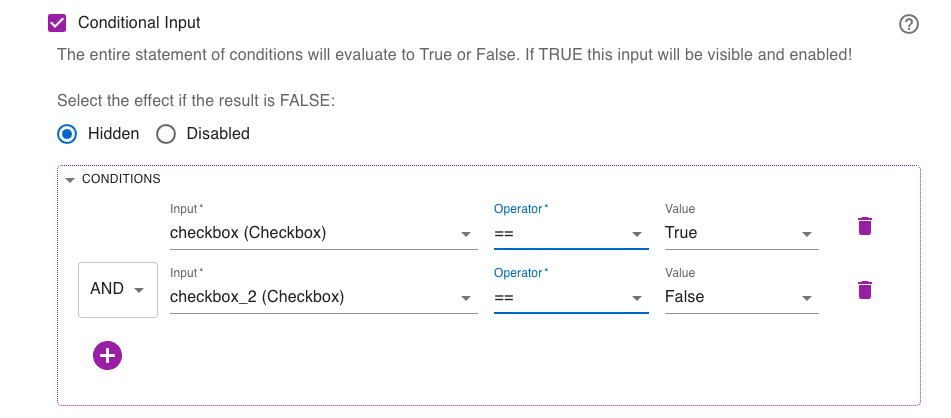
Conditional Input
| 🏆 This is a premium feature |
|---|
The following provides a detailed description about the Conditional Input feature
Why use it?
The Conditional Input feature allows you to create more complex and dynamic user interfaces. You can now hide or disable an Input based on the value of other Inputs!
This feature also works with Input Groups!
This is useful when you want to create a more user-friendly interface by only showing or enabling Inputs when certain conditions are met.
Examples use cases
- Have a Slider be visible only when a Checkbox is checked
- Display a different Input Group depending on the value of a Dropdown.
How does it work?
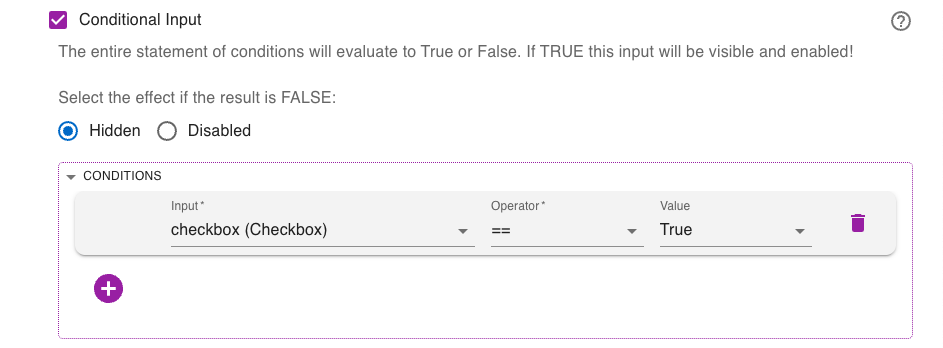
For the Input that you want to hide or disable, you can create a set of conditions that will evaluate to TRUE or FALSE.
- If TRUE the Input will be visible and enabled!
- If the result is FALSE, you can select if the Input will be hidden or disabled.
For example
We have a Slider that we only want to show when a Checkbox is checked.
Each condition is composed of 3 parts and calculates a binary result (TRUE or FALSE) by evaluating the values of other Inputs.
- Input - The other Input (e.g Checkbox) to be evaluated
- Operator - How the other Input is evaluated (e.g. ==, !=, >=, ...)
- Value - The value that the other Input is evaluated against
Think of the condition as a simple equation. For example, checkbox == True will evaluate to TRUE if the Checkbox is checked and FALSE if it is not.
Do it yourself
Let's make the Slider visible only when the Checkbox is checked.
Step 1. Click ![]() to edit the Slider Input and select Conditional Input.
to edit the Slider Input and select Conditional Input.

Step 2. Select the effect on the Input if the conditions evaluate to FALSE. You can choose between:
Hidden: The Input will be hidden
Disabled: The Input will be visible but disabled

Since we want to hide the Slider when the Checkbox is not checked, we select Hidden.
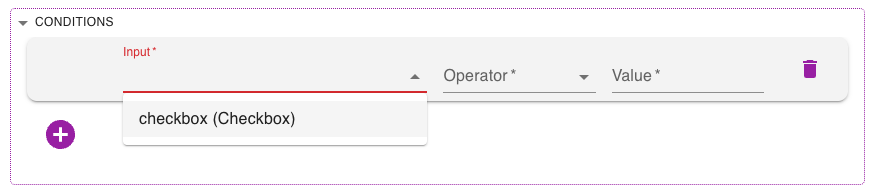
Step 3. To create a condition you must define the 3 sub-components.
a. First select the Checkbox as the Input to be evaluated.
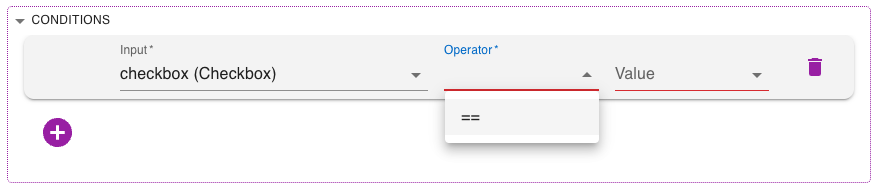
b. We want to evaluate whether or not the Checkbox is TRUE, therefore select the == operator
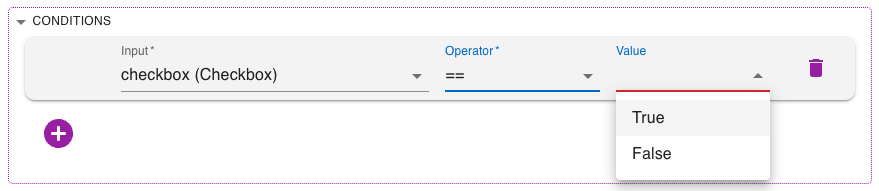
c. Finally, the value TRUE is selected
When editing an input, don't forget to click on APPLY CHANGES at the bottom of the screen to save your work
Test it out for yourself
Test out the condition we created above!
If the Checkbox is TRUE (checked) the Slider will be visible.
Additional
ℹ️ Note: We currently do not offer creating conditions based on the following Input Types: Date Time, File, Rich Text.
Adding a condition
To add a condition, click the ![]() button. There can be as many conditions as you want!
button. There can be as many conditions as you want!
Combining Conditions
You can combine conditions using AND or OR.
Order of operations
AND takes precedence over OR.
E.g. A OR B AND C is evaluated as A OR (B AND C).
Think of the conditions as a boolean expression. For example, checkbox == True AND checkbox_2 == False will evaluate to TRUE if checkbox_1 is checked and checkbox_2 is not checked. This could be thought of as A AND !B in boolean algebra.
If this is confusing, don't worry! You can always test out your conditions to see if they work as expected!